Bring your Domino Install into the new Decade with Domino 11
- Justin Hill
- Jan 18, 2021
- 5 min read
Updated: Jun 9, 2025
Are you still installing Domino the same way you did 10 years ago? If so, it’s time to refresh some of this, with the help of Prominic’s own Doug Robinson, whose team of Domino admins and tech support pros do this almost daily. Here are our best practices.
What’s New in Domino11:
Cleared technical debt: installer, JRE, SSL
Updated OS support – Added CentOS!
Ability to authenticate Internet users against ID Vault
DAOS Tier2 storage
What has changed over the last 10 years:
8.5
DAOS – a great tool for large databases that have attachments in them.
9
New on-disk structures
dbmt
SAML with ADFS
NIFNSF
Verse on-Prem webmail
10
Cluster symmetry
SAML 2.0 for widespread SSO
Every server setup
The server document can be accessed from Domino Admin or Notes:
Server doc
Messaging config
Domain doc
It can also be accessed from the server console or file system:
Notes.ini
Server doc initial setup:
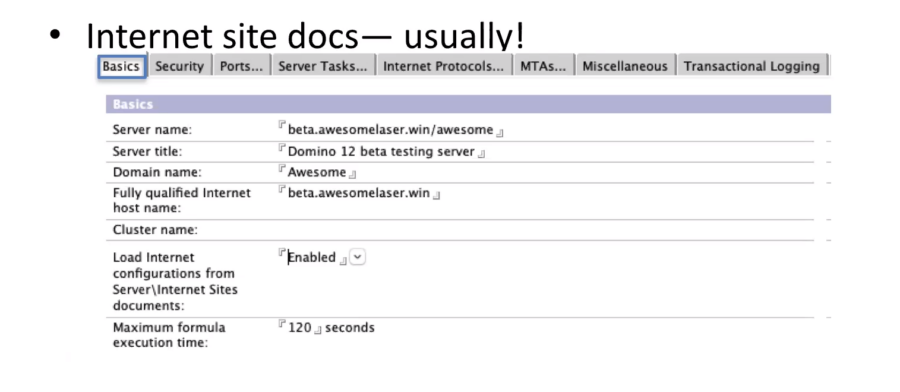
When it comes to Internet Site docs you need to be careful if you are looking for that flexibility for websites; if you are adding that to a server that it’s already been up and running for a while you need to make sure that all of your other SMTP ports active on that server have Internet site docs as well. This is one of the top ways to break your SMTP in an existing environment.
Next comes the Security Tab:

This is the very next step as you need to set up administrators and unrestricted agent rights, if you have them to make sure your server is monitored properly.
You will need to understand the scope of who your Flex admins are and who your regular administrators are; as the groups should be distinct.
Next, you’ll need to set the server access list. One important thing to keep in mind is setting a Deny access list as well set up, even if it might take some time before you actually use it. It’s good practice to have it set up.
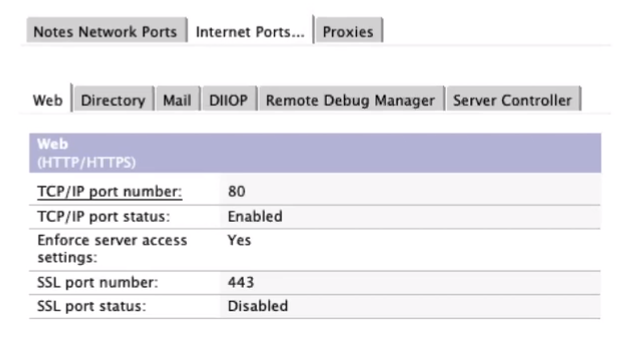
The Ports Tab :
Configure multiple network ports if applicable
Update your SSL Ciphers if you are not using Internet site docs
Enable 443, set 80 to redirect SSL
Manage all your mail ports.
A quick note here is that the deny access list from the Security tab does not automatically apply to HTTP.
The Server Tasks tab:
Control agent manager simultaneous run limits and execution time
Domain Catalog
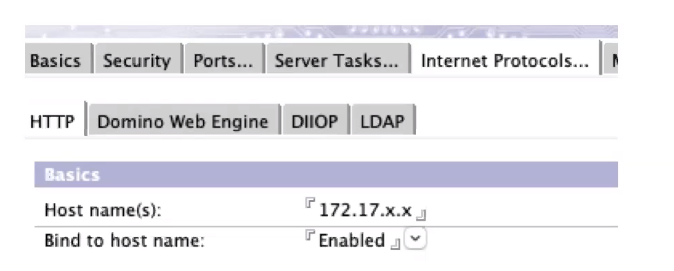
Internet Protocols Tab:
Host name and bind to host name – especially for multiple NICs or SSLs
Internal IPs or FQDNs (on traditional NATs) but don’t duplicate.
HTTP Logs (Still on Internet Protocols -> HTTP )
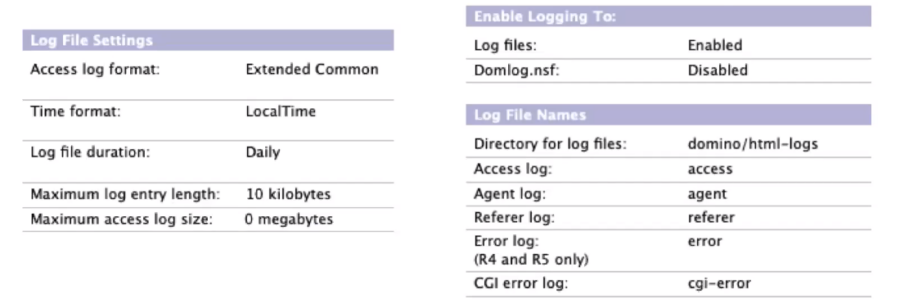
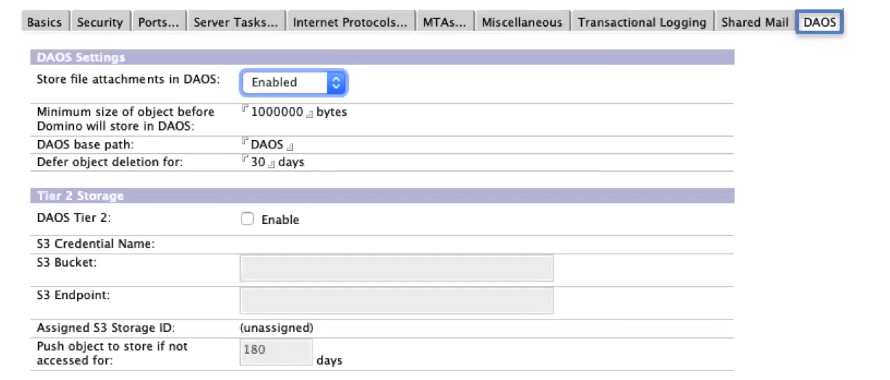
Translogs:should be enabled roughly when you enable DAOS

The quick notes here would be that 4Gb is the maximum size Domino supports and that there are certain databases where you might not want to enable transactional logging but they might prove themselves to be helpful when set up from the get go.
DAOS
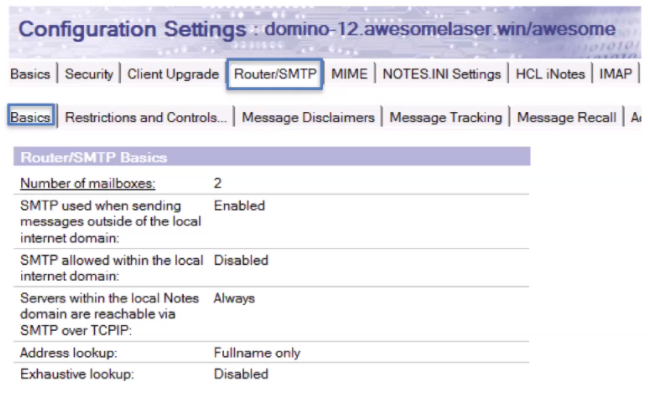
Messaging Config
Want to make sure you edit the right doc – may be a default but a server group or server-specific will override
Is less broad in scope than the server doc, specific to mail items, but can apply across multiple servers
Watch out for the new/bad messaging configs being created when registering/configuring new servers!
Relay host is for all outbound SMTP messages (relaying outbound through a corporate relay server, ProofPoint service, etc.)
Often the best way to accomplish SMTP over TLS; Domino can do it but has historically had issues down-negotiating
Smart host used for running the same Internet domain mail across multiple services.
You will want to make sure that the relay is verified and as you can see in the bottom right that “Allow all authenticated users to relay” which will allow valid users to send through. You can use this in conjunction with port 25 firewall restrictions where possible.
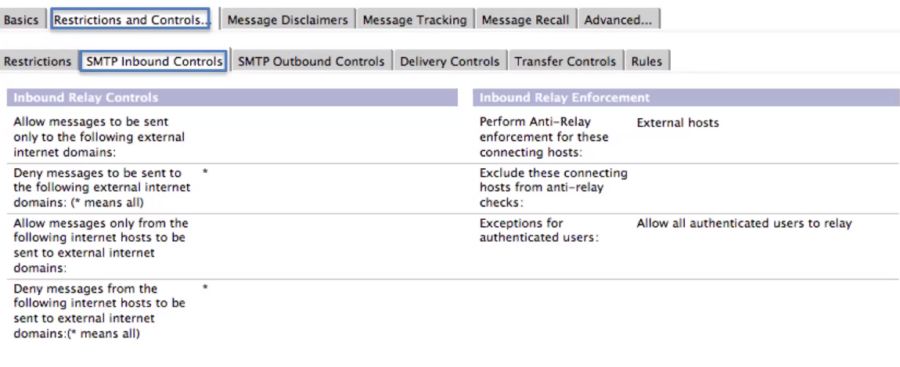
If you do have the port 25 open you should investigate having a DNS Blacklist filter like SpamHouse.
Router/SMTP – Restrictions and Controls – SMTP Inbound Control
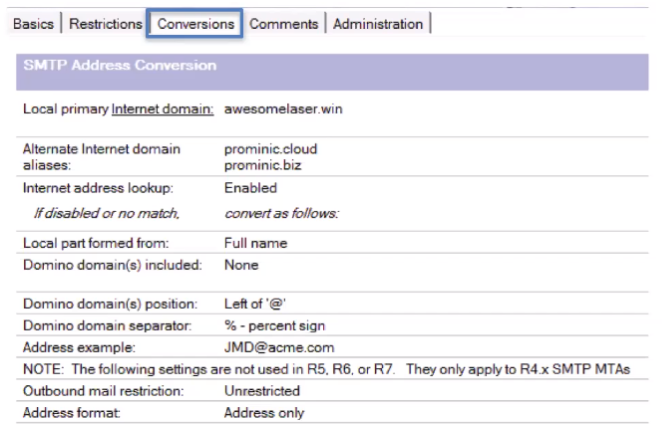
Global Domain doc
Defines what Internet domains should receive mail on the Domino domain servers
If a domain is listed it will not do any external MX lookup! Common culprit in mail to old domains breaking
Also affects sender address lookup; can be culprit in Jane_User/domain@internetdomain.com
Should contain your Internet domain(s)
Notes.ini
Can also be distributed through messaging config!
Latest ODS Create_R10_Databases=1
Verify HTTPPJMMaxHeapSize 2048M for XPages
FTG_USE_SYS_MEMORY=1
UPDATE_FULLTEXT_THREAD=1
MailfileDisableCompactAbort=1 for mail servers
Debug_Enable_Compact_8_5=1
Verify the contents of your “tasks”
Every-Server Setup – Compact and restart
Server-down Domino operations and Notes-down operations run the same
Go to the data dir, invoke the program you want
cd/local/notesdata
/opt/hcl/domino/bin/compact -c -ods (daosmgr is not available by default until D11)
D:\then cd HCL\Notes\Data or similar
D:\HCL\Notes\ncompact.exe -c -ods
Mac: you have this little article to give you a hand
It is highly recommendable to do a server-down compact -c -ods on every server. You might need to run it multiple times.
Cluster and Symmetry Setup
Initial Cluster Setup
Servers should be able to reach each other on their internal IPs (assuming LAN)
If you can add a specific cluster port that can be great!
If you do this, make sure to specify in the Notes.ini the Server_Cluster_Default_Port= or it will otherwise just use the first one
Sh cluster easy way to see connectivity to/from each server
Advantages:
Clusters allow for streaming cluster replication
Introduced back in Domino 8.5, SCR allows for DB updates to be streamed from memory over network to cluster mates even as/before written to disk
Add in Domino 11 there’s now the ability to resume SCR on server restart!
Better failover and mail failover.
Cluster Symmetry
Cluster symmetry provides an answer to the ages old question of “If I create a db on one server, is it auto-created on the other”?
BUT has some places and ways it can have problems
Does require a Dom 10 or later names.nsf
Does not cover any databases not in folders
Can fail to address duplicate filenames
Cluster Setup
Cluster setup is easy as can be: select a server doc or server doc(s) from all server docs view, add to cluster
Same for creating new or adding to existing
If you add them immediately you should be able to see results from the console “sh cluster” command inside 2-3 minutes.
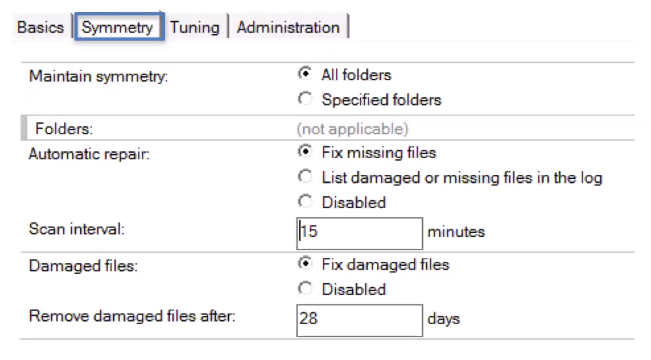
Add Cluster Symmetry:
Create a cluster configuration doc – Easier from Admin client’s Configuration tab, then Cluster – Cluster Configurations
Update the Symmetry tab to maintain symmetry for all or specified folders, and to fix missing and damaged files
Add autorepair and repaircleanup to servertasks – on each clustermate and restart the servers.
You can check out the presentation here, and make sure to contact us should you need assistance with server setup.


Comments